How Will Phase 2 of the Solar Air Conditioner Project Impact Energy Efficiency?
- Tim Havner
- May 24, 2024
- 2 min read
**Harnessing the Sun: Phase Two of My Solar Adventure**
Hey XploringTheOutdoors fam, Tim here! Today, I'm excited to share the first phase of my solar energy journey. After spending a lot of time researching, I decided to invest in the Eco-Worthy solar tracker to boost my solar production. For those unfamiliar, the Eco-Worthy solar tracker is a 2-axis tracking system that uses a sensor to keep the panels aimed at the sun all day long. It's pretty neat, right?
Assembly and Installation
Putting it together was straightforward, though programming the controller had a bit of a learning curve. It didn't take long to figure out, and soon I had the perfect spot picked out for it. I started by digging and framing up the foundation for concrete to anchor the sun tracker. Once it was set, I mounted the 200W BougeRV solar panel and let it do its thing. A few tweaks to the programming, and the tracker was doing exactly what I wanted.
Setting Up the System
Next up was the inside setup to capture and store all this free energy. I began by mounting a piece of painted plywood to the wall to keep everything organized. Then came the installation of the components:
1. **Renogy Adventurer 30 Solar Charge Controller with Bluetooth Module** - This was the brain of the operation. Amazon Affiliate Link: https://amzn.to/3wFwdpO
2. **30amp PV Disconnect Breaker** - Installed between the PV array and the charge controller for safety. Amazon Affiliate Link: https://amzn.to/3yoMZKi
3. **30amp Breaker** - Placed between the charge controller and the GoKwh 12.8V 100AH LifePO4 Battery with built-in Bluetooth for monitoring.
Amazon Affiliate Link: https://amzn.to/3WKoHV5
4. **Renogy 2000W Inverter** - To convert DC power to usable AC power.
Amazon Affiliate Link: https://amzn.to/4boGe9R
5. **GoKwh 12.8V 100AH LifePO4 Battery With Built In Bluetooth**
Affiliate Link: https://gokwh.com/?coupon_code=timothygw20
Use the link above to save $20 on your purchase
To protect everything from surges, I plugged a surge protector into the inverter. With everything connected, it was time to power up the system. Always start by turning on the battery power to the charge controller, so I flipped the breaker, and the controller came to life. Then I turned on the PV disconnect, and power started flowing in. It felt like a modern-day adult science project!
Testing the System
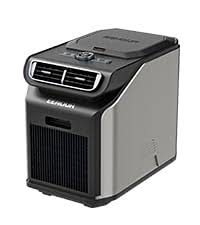
The next day, with the battery at 100%, it was time to test it with my Eenour portable air conditioner. I powered it on to let the power stabilize and see where we stood. After 30 minutes, the air conditioner was stable at 500W. With a battery capacity of 1250Wh, I could run it for about 2.5 hours. However, since I was bringing in 150W from the solar panel, my runtime extended to around 3.75 hours. Not bad, but it was clear that the next upgrade in phase three would be crucial – I needed to produce more power from the solar array.
Stay Tuned!
So, there you have it! Phase two of my solar adventure is complete. If you’re into producing your own free energy (well, after the initial purchase, of course), this journey is for you. Don’t forget to like and subscribe to follow my journey to solar-powered air conditioning. Check back for phase three on May 31st!
_edited.jpg)


Comments